Gimme shelter
November 17, 2022
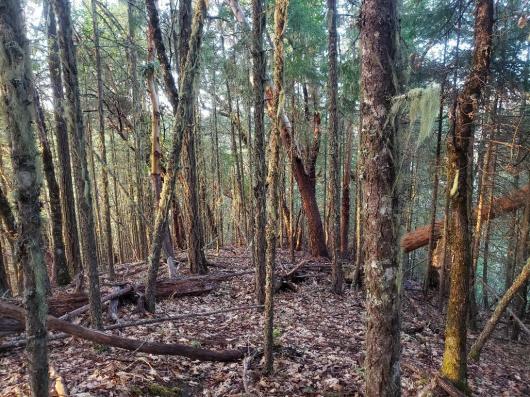
The three basic elements required for animal survival are food, water and shelter. Like us, wild critters need protection from the elements, and a place that provides a bit of safety and security in an otherwise tough world.
The truth is, wild animals are more often than not living their lives on a razor’s edge. Whether carnivore or herbivore, if the daily requirements of those three basic survival elements are not met – even just once or twice – it can be game over. All this sobering information is intended to highlight the importance of animals having access to quality habitat on a given landscape. Fortunately for both wildlife and landowners, supplementing habitat in the form of pile structures is simple, and it’s one of the top management tools available, according to the Woodland Fish and Wildlife Group.
A habitat pile is often referred to as a “brush pile,” although there’s ideally a bit more technique involved than just piling brush. It’s a structure made of woody material that’s designed and built to provide effective and long-lasting refuge for wildlife in a place where the natural habitat features they’d normally use may be lacking. Habitat piles can be as basic as piled brush, piled stumps or piled logging debris (“slash”) that’s retained, but there are a couple suggested pile designs that allow just about anyone to provide their resident wildlife with a high-quality structure to rest, roost, nest and nap for years.
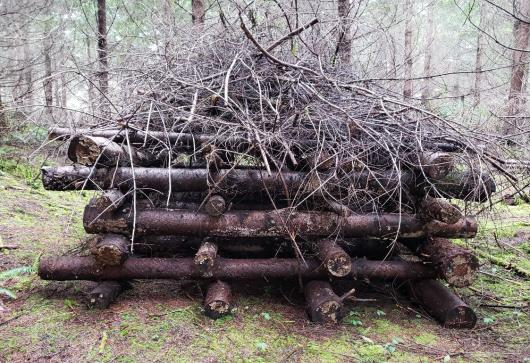
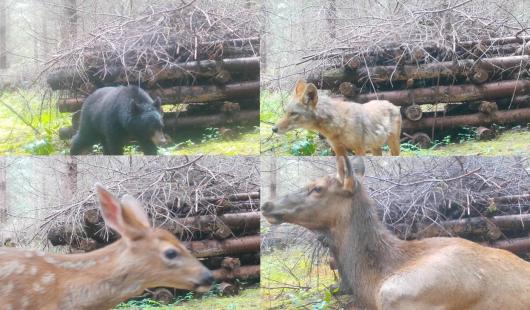
It’s important to state that there is no single correct way to make a habitat pile; here we’ll follow the guidelines suggested by the Northwest Natural Resource Group. The first design is for a habitat pile that somewhat resembles a messy log cabin once it’s completed, and its function is similar as well. Aim for a structure that’s about 10 feet wide and 6 feet tall. This pile will be a safe haven for any brush or wood-loving species. Chipmunks, rabbits, weasels, elk, deer, bears, coyotes, grouse, towhees, thrushes, woodpeckers, snakes, lizards or just about any critter in the woods can make use of one of these structures.
Starting with the largest-diameter logs or limbs (4” across or larger), build the base of the structure by laying wood pieces on the ground parallel to one another, with gaps between them. Gaps allow wildlife to enter and exit. Next, take another set of similar pieces and lay them on top of the base, perpendicular to those first logs. Repeat that pattern until the structure has close to six feet of height to it, then top it off with a roof of smaller limbs and brush at least 18” deep. Remember to think “log cabin.”
The resulting habitat pile will have a sturdy build with lots of interior space and a brushy roof to keep it cozy inside. Try to build at least two or three of these structures per acre, spacing them out about a hundred feet from each other. Place them near water and food sources, or where a little extra warming or shade might be beneficial.
Keep in mind that these structures are flammable, so don’t place them close to anything valuable in case of a fire. Also, keep an eye out for pest activity, though it’s unlikely these piles will have a major impact on pests. In this article the Washington State Department of Natural Resources recommends not piling green Douglas-fir or ponderosa pine, especially larger pieces, between January and August, to avoid potential issues with bark beetles. As long as these safety tips are heeded, there’s no real wrong way to build this pile. Use what you’ve got! Pallets could work as a base, or even stones. Try a triangular frame instead of a square, if you’re short on logs.
The second suggested design is meant to simulate a large log lying on the ground. Large down wood is important to ground-dwelling animals that need moisture, such as amphibians, mollusks and arthropods. Plants and fungi thrive on them, exploiting the nutrients as they decay. These log surrogates are simple structures that use smaller logs brought together to help fill the gap left by the absence of large natural logs.
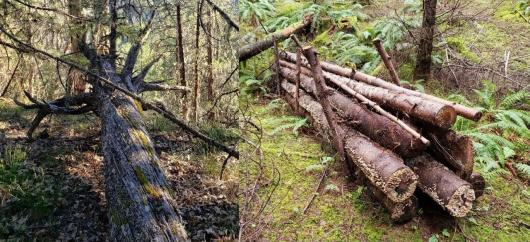
Aim to create a log structure that’s at least 20 feet long and 2 feet wide. Start by building a crib to hold the individual wood pieces in place, by vertically driving in stakes or branches on both sides, positioned to accommodate your desired length and width. Once the crib is built, fill it with smaller logs stacked together. That’s it! The same safety guidelines noted above apply to surrogate logs as well as log-cabin-style piles, and you can use similar spacing on a surrogate log pile.
There you have it! Two easy structures that can be built out of on-hand material that will provide shelter to wildlife for years, or even a decade with a little maintenance. If the suggestions here aren’t doable, don’t be afraid to simply make a pile, and instead of burning brush or slash, pile it (at least the largest pieces and stumps) a safe distance from structures and just leave it. For tips on what to set aside from slash piles, see this publication from OFRI about managing logging slash piles. The critters will thank you… in their own way, of course.
For more information on habitat piles and other management tools for wildlife habitat, see this article by Northwest Natural Resource Group, as well as this publication about managing wildlife leave trees and this publication about enhancing wildlife habitat on managed forests, both from OFRI.
Jon Cox
Wildlife Technician
Cafferata Consulting, LLC
Photos by Cafferata Consulting, LLC